I thought this would be particularly tricky as I really don't have the patience for waiting for dough to chill in the fridge repeatedly, but it ended up being reminiscent of last year's Schichttorte - lots of relatively easy steps that lead to a striking yet simple bake.

As ever, the original recipe can be found on the BBC Food website here, but it's also below with my notes and photographs.
Also, if you already have the baking bug then Lakeland have just released a whole range of special Bake Off products. My basket is full (obviously), and if you fancy themed goodies too to accompany the series then you can find the range here.
Ingredients:
For the dough:
60g/2¼oz strong white bread flour, plus extra for dusting
60g/2¼oz plain flour
1 tsp salt
40g/1½oz unsalted butter, melted
For the butter layer:
125g/4½oz unsalted butter, at room temperature
25g/1oz strong white bread flour
25g/1oz plain flour
For the filling:
50g/1¾oz granulated sugar
2 tsp ground cinnamon
Icing sugar, for dusting

Method:
Put the flours, salt, butter and 50ml/2fl oz cold water in a bowl or a free-standing electric mixer with dough hook.

Gently mix to form a dough and either transfer the to to a lightly floured work surface and knead by hand for 5 minutes until smooth, or leave the mixer and dough hook to work their magic (which I did: I detest kneading dough!).
Shape the dough into a square, wrap in cling film and chill for an hour in the fridge or freeze for 20-30 minutes.

For the butter layer, cream the butter and flours together using an electric mixer.

Sandwich the mixture between two sheets of cling film and roll out to a rectangle the same width as the square of dough, but twice as long. Chill in the fridge for 25 minutes.

Unwrap the chilled dough and butter layer. Place the chilled butter layer, short end facing towards you on a lightly floured surface and place the square of dough in the centre of the butter sheet. Make sure it is positioned neatly and covers almost to the edges.

Lift the exposed butter sheet at the top and fold it down over the dough, then fold the exposed butter sheet at the bottom up over the top, so the dough is completely enclosed in the butter sheet. Place the dough on a lightly floured surface, short end towards you. Roll out to a rectangle, keeping the edges as even as possible. Fold the top quarter down and the bottom quarter up so they meet neatly in the centre. Then fold the dough in half along the centre line. This is called a book turn.

Wrap the dough in cling film and chill for 25 minutes.
Remove the dough from the fridge and make another book turn. Wrap the dough in cling film and chill for 25 minutes.
For the filling, mix the granulated sugar and the cinnamon together in a bowl.

On a lightly floured surface roll out the pastry to a rectangle as before and sprinkle over the sugar.

Make another book turn to incorporate the sugar, then roll out the pastry 1cm/½in thick, to a rectangle 12x20cm/4½x8in.

Roll up the pastry from the short end like a Swiss roll. Wrap in cling film and chill for 25 minutes.

Preheat the oven to 200C / 180C Fan / Gas 6. Line 2 baking trays with silicon sheets or non-stick baking paper.
Trim the ends of the roll and cut into 8 x 1cm thick slices. I ended up with 12 pieces, along with the offcuts from both ends, so don't worry if you make more than 8 too!

Dust the work surface heavily with icing sugar and roll each piece of dough out very thinly, turning to coat in the sugar and to prevent sticking.
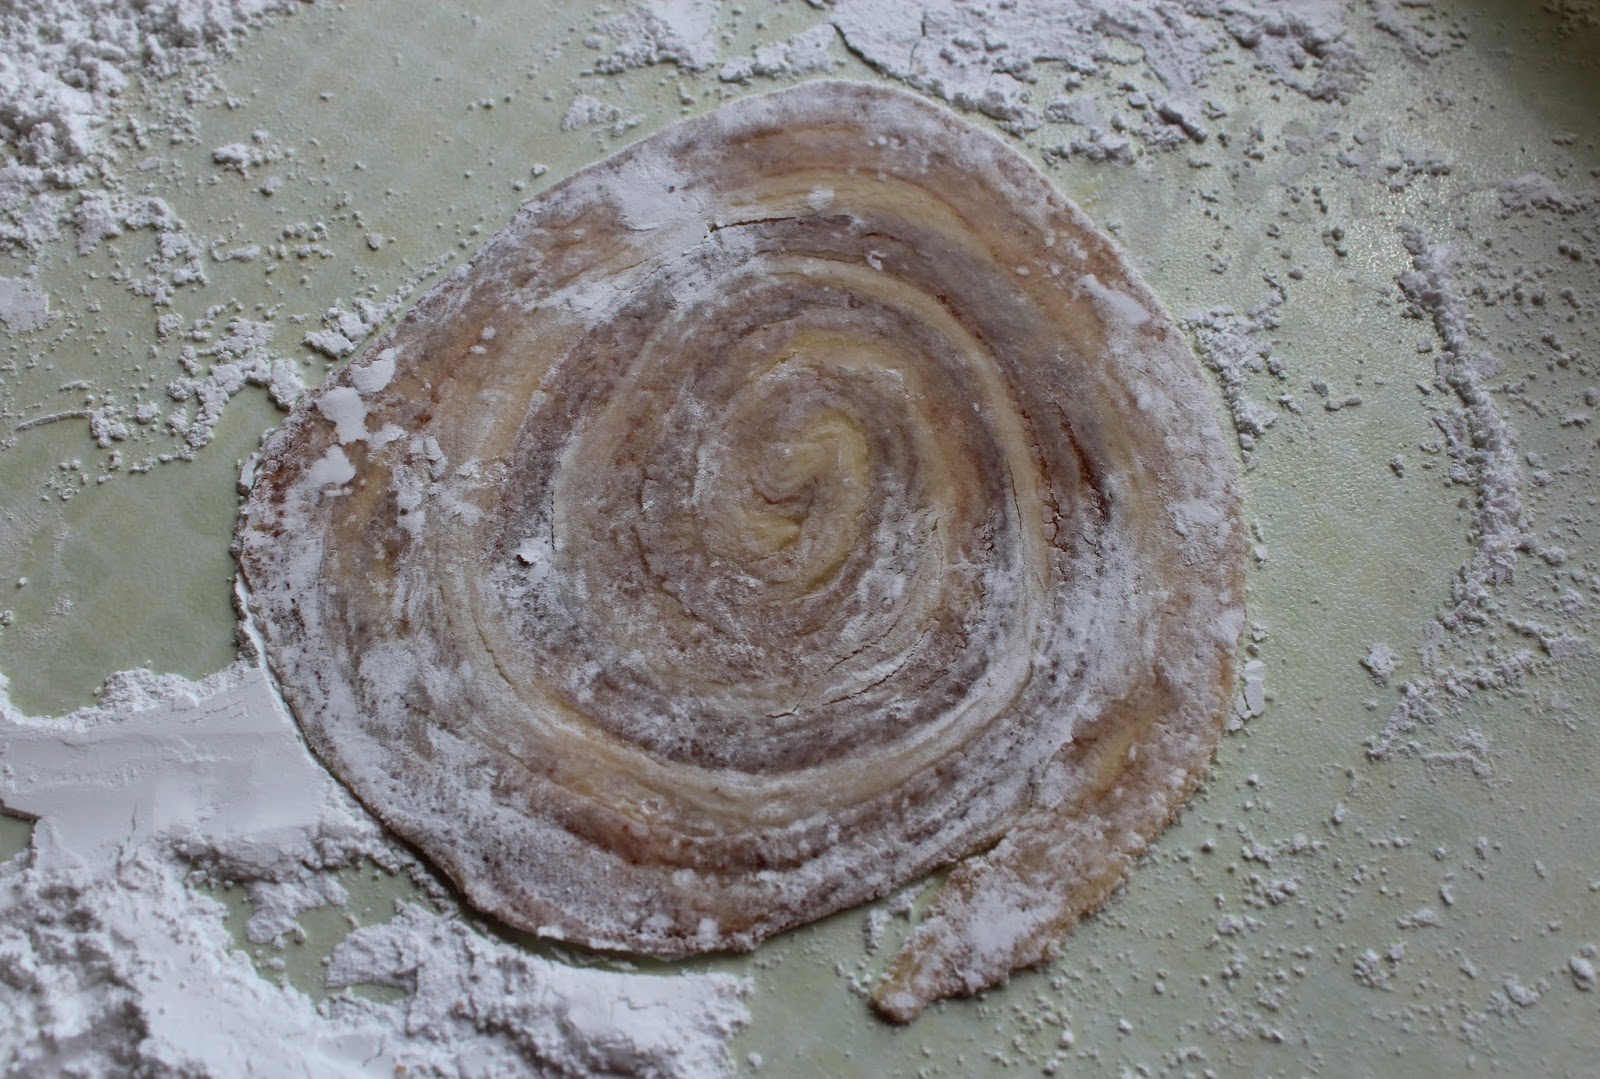
I wasn't sure quite how thin they needed to be but ended up with them literally paper thin: you could see the work surface underneath and they were ridiculously delicate to handle. I also didn't like the sort of tail that popped out at the edge (at the bottom above), so after the first couple of tries I started tucking them underneath after the initial rolling and it squashed them in making the arlettes perfectly round. Maybe they're supposed to look more rustic, but I think they look much better in neat circles!
Place the biscuits on the prepared trays and bake for 5 minutes.

Remove from the oven, carefully turn the biscuits and cook for a further 3-4 minutes, or until golden-brown.

Transfer to a wire rack to cool. Apparently they're best served with coffee or ice cream, so enjoy!


I fully anticipated that these would be a mini disaster as I have very little faith in my ability to make puff pastry from scratch, but they worked perfectly! There are crispy, flaky layers galore and breaking them apart produced a rather satisfying "snap" which made me happier than it probably should have!


Initially I didn't roll the pastry up tight enough at the final stage so frantically removed it from the fridge, unrolled it, rolled the whole rectangle out longer and then re-rolled into a swiss roll shape an awful lot tighter (too may variations of 'roll' in the sentence but I'm sure you understand...). I think this helped enormously to create the neat swirling pattern in the middle and really intersperse the sweet cinnamon layer more evenly throughout the biscuit. Basically, roll it as tight as possible for greater effect!


I'm pleased with these, but what do you think? Will you be giving Paul's Arlettes a try this weekend or will you be giving them a wide berth in the kitchen? Do let me know in the comments below!
[N.B. this post contains affiliate links to Lakeland products.]
No comments:
Post a Comment